# Build
## Preparations
```
git clone https://github.com/jomjol/AI-on-the-edge-device.git
cd AI-on-the-edge-device
git checkout rolling
git submodule update --init
```
## Update Submodules
```
cd /components/submodule-name (e.g. tflite-micro-example)
git checkout VERSION (e.g. HASH of latest tflite-micro-example build)
cd ../../ (auf Ebene von code)
git submodule update --init
```
Evt. muss man vorher noch einige Verzeichnisse in compenents von Hand löschen, da sie beim checkout nicht gelöscht wurden (vor update -- init)
## Build and Flash within terminal
See further down to build it within an IDE.
### Compile
```
cd code
platformio run --environment esp32cam
```
### Upload
```
pio run --target upload --upload-port /dev/ttyUSB0
```
Alternatively you also can set the UART device in `platformio.ini`, eg. `upload_port = /dev/ttyUSB0`
### Monitor UART Log
```
pio device monitor -p /dev/ttyUSB0
```
## Build and Flash with Visual Code IDE
- Download and install VS Code
- https://code.visualstudio.com/Download
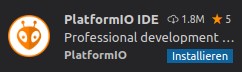
- Install the VS Code platform io plugin
-  - Check for error messages, maybe you need to manually add some python libraries
- e.g. in my Ubuntu a python3-env was missing: `sudo apt-get install python3-venv`
- git clone this project
- in Linux:
```
git clone https://github.com/jomjol/AI-on-the-edge-device.git
cd AI-on-the-edge-device
git checkout rolling
git submodule update --init
```
- in VS code, open the `AI-on-the-edge-device/code`
- from terminal: `cd AI-on-the-edge-device/code && code .`
- open a pio terminal (click on the terminal sign in the bottom menu bar)
- make sure you are in the `code` directory
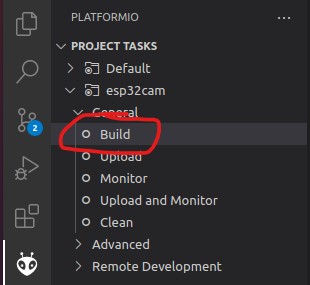
- To build, type `platformio run --environment esp32cam`
- or use the graphical interface:
- Check for error messages, maybe you need to manually add some python libraries
- e.g. in my Ubuntu a python3-env was missing: `sudo apt-get install python3-venv`
- git clone this project
- in Linux:
```
git clone https://github.com/jomjol/AI-on-the-edge-device.git
cd AI-on-the-edge-device
git checkout rolling
git submodule update --init
```
- in VS code, open the `AI-on-the-edge-device/code`
- from terminal: `cd AI-on-the-edge-device/code && code .`
- open a pio terminal (click on the terminal sign in the bottom menu bar)
- make sure you are in the `code` directory
- To build, type `platformio run --environment esp32cam`
- or use the graphical interface:
 - the build artifacts are stored in `code/.pio/build/esp32cam/`
- Connect the device and type `pio device monitor`. There you will see your device and can copy the name to the next instruction
- Add `upload_port = you_device_port` to the `platformio.ini` file
- make sure an sd card with the contents of the `sd_card` folder is inserted and you have changed the wifi details
- `pio run --target erase` to erase the flash
- `pio run --target upload` this will upload the `bootloader.bin, partitions.bin,firmware.bin` from the `code/.pio/build/esp32cam/` folder.
- `pio device monitor` to observe the logs via uart
- the build artifacts are stored in `code/.pio/build/esp32cam/`
- Connect the device and type `pio device monitor`. There you will see your device and can copy the name to the next instruction
- Add `upload_port = you_device_port` to the `platformio.ini` file
- make sure an sd card with the contents of the `sd_card` folder is inserted and you have changed the wifi details
- `pio run --target erase` to erase the flash
- `pio run --target upload` this will upload the `bootloader.bin, partitions.bin,firmware.bin` from the `code/.pio/build/esp32cam/` folder.
- `pio device monitor` to observe the logs via uart